Day 11: Supply & Demand Zones Vs Order Blocks — ICT & SMC Compared | Trading Strategy Guides
One of the Most Debated Questions in the ICT/SMC Community
Welcome back to Week 2. Today we tackle a debate that fills trading forums and YouTube comment sections every single day:
Are supply and demand zones the same as order blocks?
Some traders say yes — they’re just different names for the same thing. Others say no — they’re distinct tools that serve different purposes. The truth sits in the middle, and understanding exactly where they overlap and where they diverge will immediately sharpen how you mark up a chart.
Let’s settle this once and for all.
What Are Supply and Demand Zones?
Supply and demand zones are broad price areas where the balance between buyers and sellers shifted dramatically enough to create a strong directional move. They originated from traditional technical analysis long before ICT or SMC existed, rooted in the simple economic principle that when demand exceeds supply, prices rise — and when supply overwhelms demand, prices fall.
In trading terms, a demand zone is a price area where significant buying pressure was previously present — price launched upward from this area, suggesting institutional buyers were active there. If price returns, those buyers are expected to step in again.
A supply zone is the opposite — a price area where significant selling pressure pushed price sharply lower. If price returns, sellers are expected to re-emerge.
The key characteristic of both: they are identified by the base — the consolidation or pause in price action that occurred before the explosive move away.
The Four Zone Patterns You Need to Know
Supply and demand zones are classified by the structure that creates them. There are four patterns, and every zone on your chart falls into one of these categories:
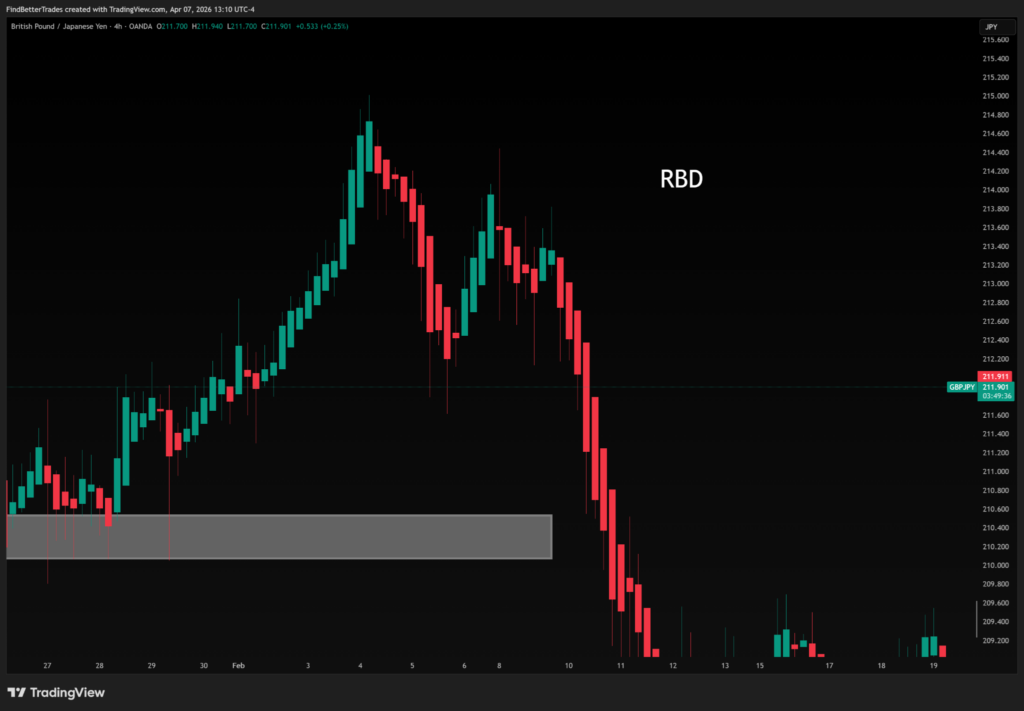
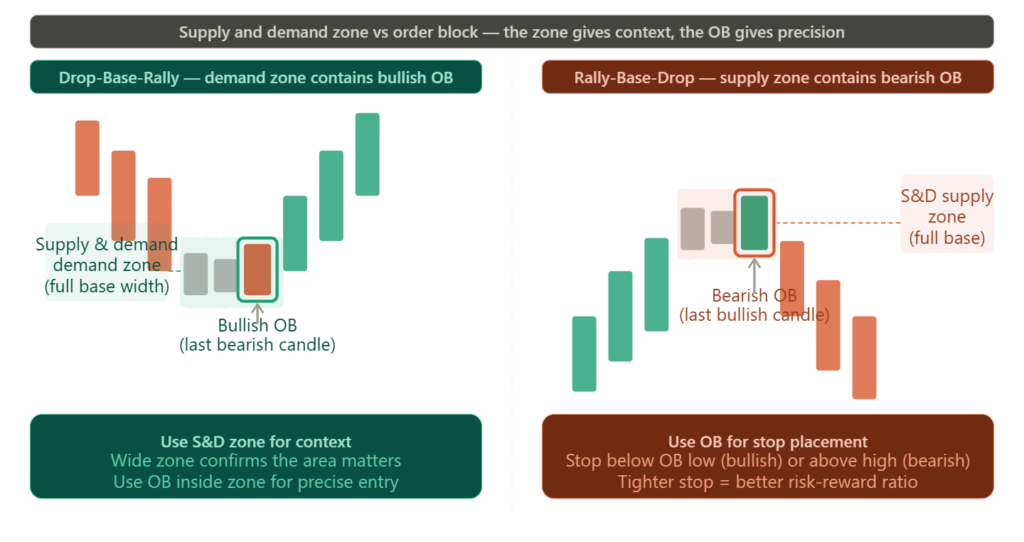
Rally-Base-Drop (RBD) — Supply Zone Price rallies upward, consolidates briefly in a base, then drops sharply away. The base becomes a supply zone. This is a reversal pattern — the market topped out here. It is the strongest type of supply zone.
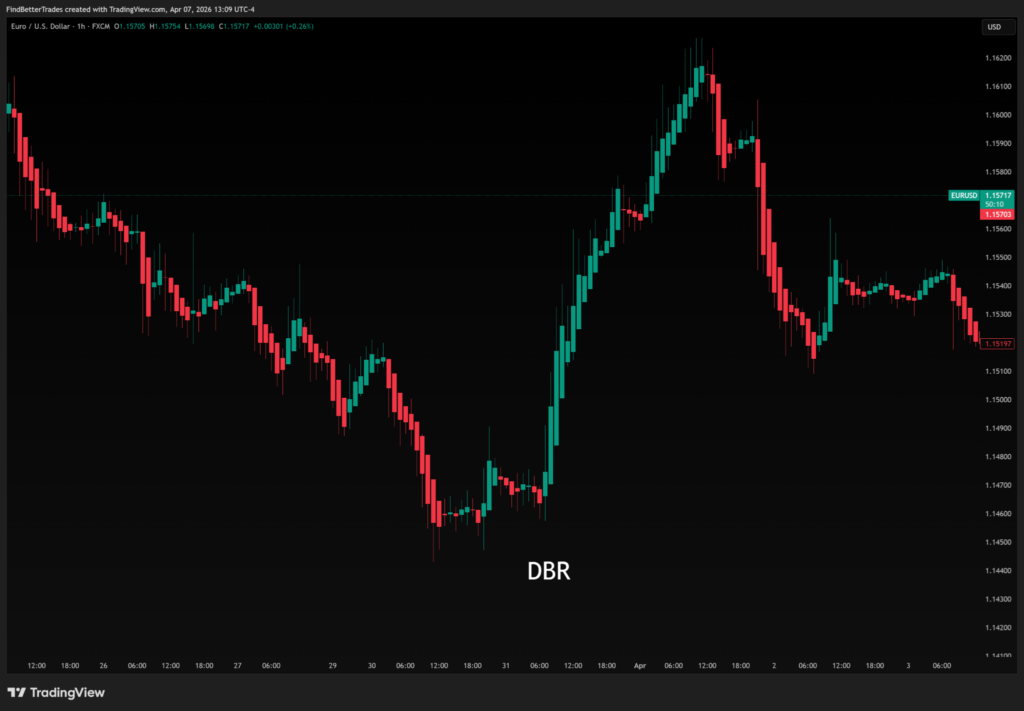
Drop-Base-Rally (DBR) — Demand Zone Price drops, consolidates in a base, then rallies sharply away. The base becomes a demand zone. This is a reversal pattern at a market bottom. Strongest type of demand zone.
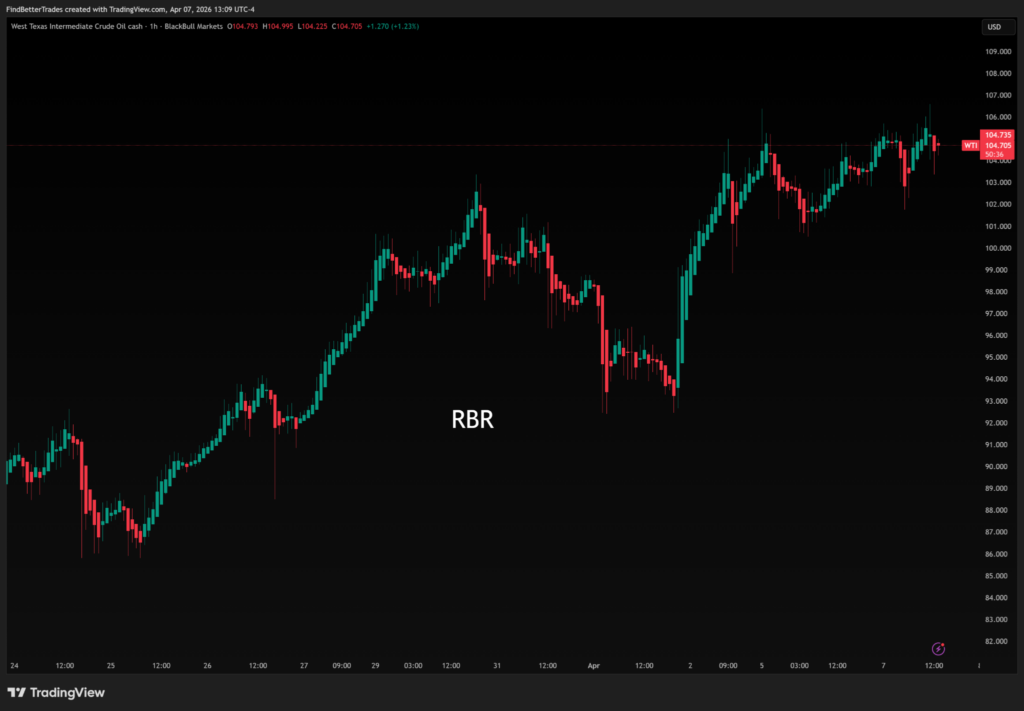
Rally-Base-Rally (RBR) — Demand Zone Price rallies, pauses briefly in a base during a pullback, then continues higher. The base forms a demand zone during a trending move — a continuation pattern, not a reversal. Reliable but less powerful than DBR zones.
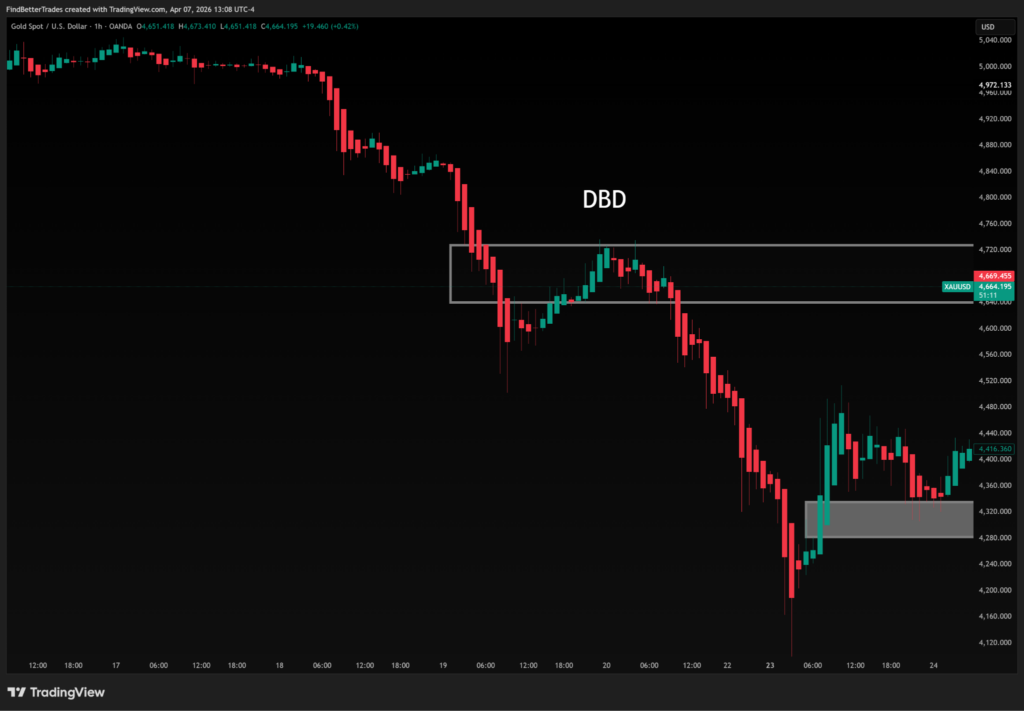
Drop-Base-Drop (DBD) — Supply Zone Price drops, pauses in a base mid-trend, then drops further. The base forms a supply zone during a trending move. Same logic — continuation, not reversal. Valid but less potent than RBD zones.
What Is an Order Block Again?
As covered in Day 5, an order block is the last single candle — or tight group of candles — immediately before an impulsive move. Specifically:
A bullish order block = the last bearish candle before a strong bullish impulse. A bearish order block = the last bullish candle before a strong bearish impulse.
It is precise, candle-specific, and tied directly to where institutional orders were placed in that final moment before price accelerated.
So What Is the Actual Difference?
Here is the cleanest way to think about it:
Supply and demand zones capture the full base area — the entire consolidation before the impulse move, from the lowest to the highest point of that range. They are broader, more conservative, and easier to identify visually.
Order blocks pinpoint the single most critical candle within or at the edge of that zone — the last candle before displacement. They are tighter, more precise, and require a sharper eye.
In many cases the order block sits inside or at one edge of a supply or demand zone. The S&D zone gives you the general area of interest. The order block gives you the exact entry candle within that area.
How SMC and ICT Each Position These Tools
SMC uses both supply and demand zones and order blocks actively. SMC educators often draw the broader S&D zone first to identify the area of interest, then look for the order block candle within it to time the precise entry. Many SMC traders treat the two as complementary — S&D for the map, OB for the GPS.
ICT is more focused on order blocks specifically and uses the term “supply and demand” differently. Huddleston’s framework de-emphasises the broader zone concept in favour of the specific PD array — the precise last candle or candle group. His view is that a broad zone is less useful than a specific candle, because institutions don’t re-enter at random points within a range — they return to the exact price level where their unfilled orders reside.
In practice the distinction matters most for stop placement. An S&D zone-based stop sits beyond the edge of the full base. An OB-based stop sits just beyond the order block candle itself — tighter, with a better risk-reward ratio, but with slightly less buffer if price sweeps the OB before reversing.
What Makes Either Zone High Quality?
Whether you use S&D zones, order blocks, or both — these three quality filters apply equally:
1. Freshness. A zone that has never been retested carries more unspent institutional orders than one that has already been visited. Fresh zones react more strongly. Tested zones often fail or only produce small bounces.
2. Speed of departure. The stronger and more impulsive the move away from the zone, the more institutional activity was present. A zone that launched a 100-pip move in three candles is higher quality than one that produced a slow, grinding 20-pip move.
3. Higher timeframe alignment. A daily demand zone inside a weekly discount area is far more powerful than a 15-minute demand zone with no higher timeframe context. Always confirm your zones are sitting in the right part of the higher-timeframe range.
The Bottom Line — Use Both Together
Here is the most practical takeaway from today’s lesson:
Supply and demand zones and order blocks are not competitors. They are different layers of the same analysis. The S&D zone tells you where to look on the chart. The order block inside it tells you exactly where to enter and where to place your stop.
A trader who uses only S&D zones gets wide stops and average risk-reward. A trader who finds the OB inside the zone gets a tighter stop, a better entry, and a meaningfully improved risk-reward ratio — while still having the broader zone as confirmation that the level matters.
Use them together and you get the best of both worlds.
Up Next — Day 12
Tomorrow we go deeper into ICT’s advanced zone toolkit — Breaker Blocks and Mitigation Blocks. These are what happens when the first order block fails — and knowing how to read them is the difference between understanding why a setup didn’t work and getting blindsided every time a zone gets broken.
→ See you on Day 12.
Source link