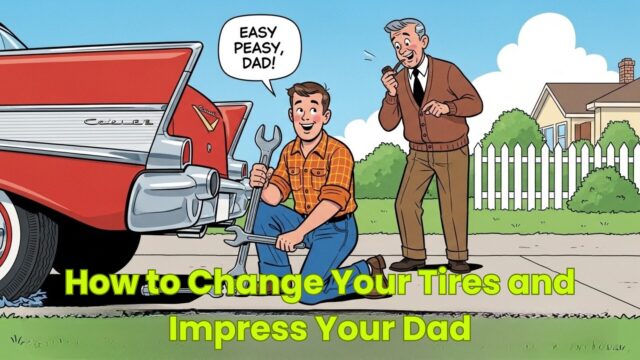
How to Change Your Tires and Impress Your Dad
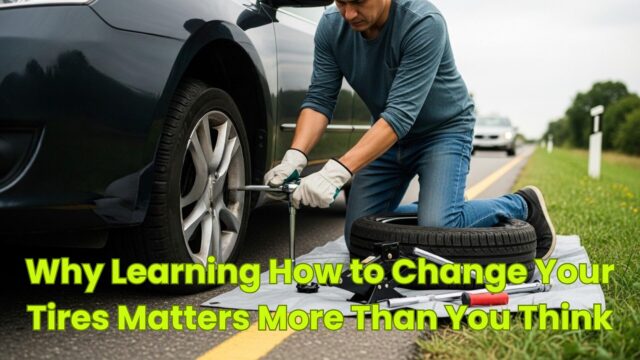


Learning how to change your tires is one of those life skills that makes you look capable, confident, and ready for anything. And honestly, who does not want to impress their dad with that level of hands-on greatness? I know I would. This simple set of steps helps you handle a flat tire without stressing out, especially when other drivers are rushing past you on the road. These skills are especially useful for cars, which are the most common vehicles people drive, but they also apply to various vehicles like trailers and non-commercial vans and trucks. Knowing how to change your tires also keeps you safe, saves money, and stops your day from falling apart over a piece of rubber.
When you learn how to change your tires, you unleash a tiny “I got this” moment inside yourself. Yes, it is a whole thing. And do not worry, I am here with enthusiasm, sass, and solid knowledge to guide you. This process can feel scary for beginners, but I promise it becomes empowering once you understand the necessary tools, the right steps, and the safety basics.
So let us get into the simple steps that will help you change a tire like a pro. I want you to feel skilled, steady, and maybe even a little smug the next time someone says “Do you know how to change your tires?” because you can flip your hair and go “Yes, actually. Let me show you.”
Find a Safe Location Before Doing Anything
Before you even touch the old tire or think about a car jack, you need a safe location. This is your first and most important move. You want a flat surface to keep your vehicle steady. Avoid soft ground because your jack might sink. I know that sounds dramatic, but trust me, gravity does not play.
Turn on your hazard lights as soon as you feel the flat tire. These lights alert other drivers that your car needs space. Your hazard lights warn them to stay clear, and that gives you room to work without feeling rushed or unsafe. You also want to pull over to a safe spot and set your emergency brake before you start anything. According to consumer reports, always choose a safe location away from traffic and, for extra safety, place wheel chocks at the opposite end of the vehicle from the tire being changed to prevent the car from rolling.
You should always think about roadside safety and emergency preparedness when dealing with vehicle issues. A safe place is not just about staying away from traffic. It is also about giving yourself space to lift the car and roll the new tire into position without wobbling. It feels good to be in control of your space, especially when you know other drivers can see you.
Gather All the Necessary Tools From Your Trunk
Now let us talk about gear. To change a flat tire, you will need the following tools: your car jack, lug wrench, rod, and of course your spare tire. You will find most of these necessary tools in your trunk, usually tucked under molded plastic panels. For more detailed information about these tools and their proper use, consult your owner’s manual, which provides vehicle-specific guidance and safety tips. Having the right tools makes you feel prepared and powerful, and honestly, it should.
You need to check your spare tire’s pressure before installing it. This is a huge detail most people forget. A spare tire with low air pressure helps no one. So check that pressure before you even lift your vehicle. I know it feels like an annoying step, but you will thank yourself later.
Using the right tools makes everything easier, from removing the lug nuts to tightening them later. I always say that confidence comes from preparedness. When you pop open your trunk and see everything ready to go, you feel untouchable. And maybe a little dramatic, but that is valid. Learn more about essential car maintenance tools every driver should have.
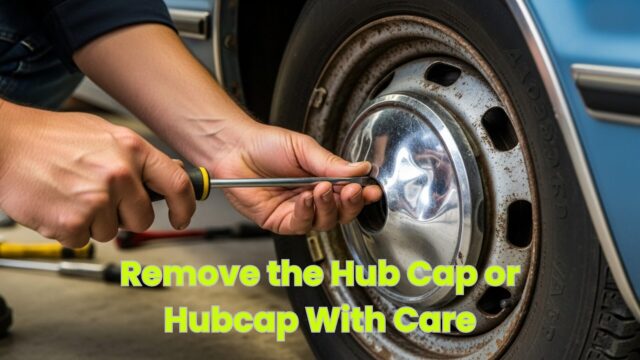
Remove the Hub Cap or Hubcap With Care
Before you loosen the lug nuts, you may need to remove the hub cap. Some wheels have them, some do not, but if yours does, you will need a flathead screwdriver or the metal edge of your lug wrench to pry it off. Be gentle. A quick twist and pull motion works best.
When you gently pull the hub cap away, make sure it does not roll into traffic. I say this because I have seen it happen and it is not fun chasing molded plastic toward the road. Keep everything close to you and organized so you do not lose track of important pieces. Staying organized keeps the process smooth. Now once the hub cap is off, you can see the lug nuts clearly. That is when things get real.
READ ALSO: How To Pursue Your Dreams Without Ghosting Reality
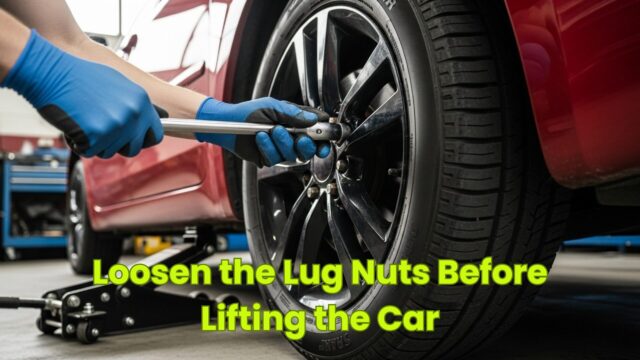
Loosen the Lug Nuts Before Lifting the Car
Now we are getting into action. Use your lug wrench to loosen the lug nuts before lifting the car. If you try to loosen the lug nuts when the wheel is off the ground, it will spin. You need the full weight of the vehicle on the tires for resistance. This makes the process safer and more effective.
Remember, loosen the lug nuts, do not remove the lug nuts yet. You are aiming for loosened lug nuts, not runaway metal bouncing across the ground. Press down on the wrench with your body weight to get things moving. If it feels tight, that is normal. Those nuts are holding your wheel secure.
This is the part where you might feel proud of your strength. Yes, you are strong. Yes, you are doing great. Keep going.
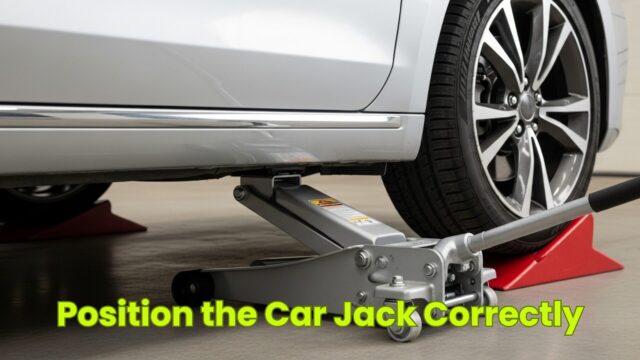
Position the Car Jack Correctly
Your car jack needs a secure position under the vehicle. Check your vehicle owner’s manual for the exact jack point and safety procedures. The jack point matters. It is designed to handle the lift without bending metal or causing damage to the car.
Place the jack on a flat surface and slowly crank it upward until it makes contact with the car. Some jacks require you to insert the handle or wrench onto a knob to operate and raise the jack. You want it steady before raising the vehicle higher. Use the rod if your jack includes one. Keep your body away from the underside of the car. This is not a moment for bravery.
Raise the vehicle just enough to lift the flat tire off the ground. You do not need the wheel floating in the air. A small gap is enough to remove and replace the tire.
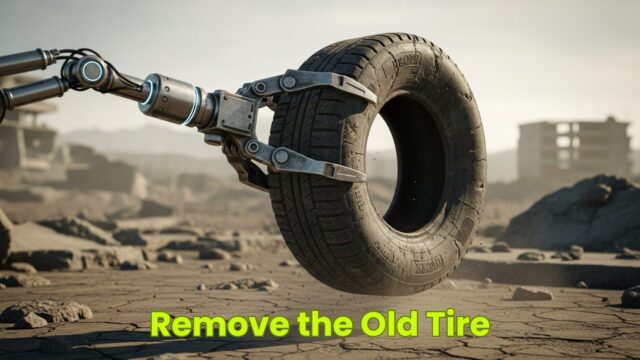
Remove the Old Tire
Once your car is jacked safely, remove the lug nuts. You already loosened them, so now you can twist them off by hand. Keep them in a safe place where they will not roll away or collect dirt. Removing the lug nuts gives you access to pull the wheel.
Hold the tire with both hands and begin pulling it toward you off the wheel studs. It can feel heavy, but you can roll it away once it is free. Keep the old tire close because roadside services or roadside assistance might need it later. Plus, you may want to inspect the tire for bolts or objects that caused the flat.
This moment feels strong and satisfying. You lifted the car, removed the nuts, removed the wheel, and now the car is ready for its new tire.
READ ALSO: How to Make Cash Quickly If You’re Broke AF
Install the New Tire Like a Total Pro
Now for the fun part. Lift or roll the new tire into position. Line up the holes with the wheel studs and push the tire into place. When replacing the old tire with the new one, make sure the wheel is properly aligned and seated. It should slide in smoothly. If not, adjust the position until the wheel is sitting flush.
Hand tighten the lug nuts first. You want them snug but not fully tight yet. Hand tighten each nut until the wheel feels secure. This keeps the wheel aligned while you lower the vehicle later. If any lug nuts are damaged or worn, they should be replaced before finishing the installation.
Having a new tire in place feels like the victory moment you deserve. And yes, you are absolutely allowed to feel smug.
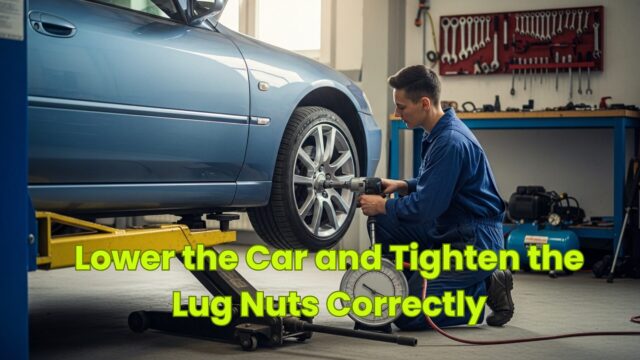
Lower the Car and Tighten the Lug Nuts Correctly
Once the new tire is hand tightened, lower the car using the car jack. Do this slowly. Once the tire touches the ground, you can fully lower the vehicle. Do not forget to fully lower the jack and remove it.
Now use the lug wrench to tighten the lug nuts in a star pattern or crisscross pattern. This method keeps pressure balanced across the wheel. You want all nuts tightened evenly. A diagonal pattern works too, but make sure it is consistent and secure.
When you tighten the lug nuts, press down and make each one tight. Make sure each lug nut is properly tightened to ensure the wheel is securely attached and safe. You want them fully tighten to keep the wheel safe. Tightening is important for safety and stability while you drive slowly away from the area.
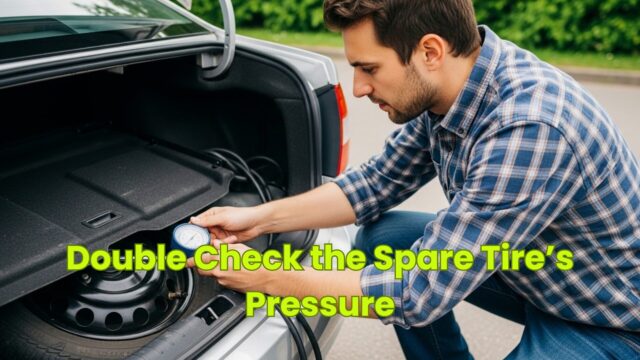
Double Check the Spare Tire’s Pressure
Before you pack up your tools, check the spare tire’s pressure again. Driving with low pressure is bad for the tire and bad for your safety. If you do not have a gauge, drive slowly to the nearest shop.
You want the pressure to be correct so the tire lasts long enough. Many spare tires are not made for long distances. Make sure you only drive slowly and carefully until you can replace the spare with a full tire. For more tips, check out our guide on understanding tire pressure and why it matters.
This is the kind of detail that shows you know what you are doing. Every expert checks their pressure.
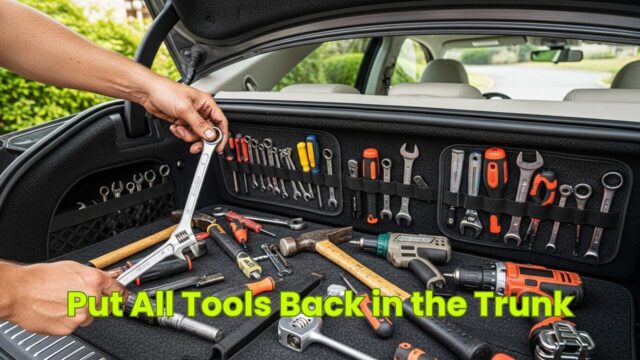
Put All Tools Back in the Trunk
A clean finish shows skill. Put your lug wrench, jack, rod, and other tools back in your trunk. Snap the molded plastic panels into place. Store your old tire in the trunk too so it does not roll around.
Keeping your trunk organized helps you access these tools fast the next time you need them. You just proved you can handle a roadside tire change, so keep your tools tidy. Read about how to organize your car trunk for emergencies.
READ ALSO: How to Not Give a Fuck and Actually Start Loving Yourself
Drive Slowly and Stay Aware
Once everything is secure, drive slowly. A spare is not meant for high speed. Watch how the car feels. If something seems off, pull into a safe spot to check the nuts, the wheel, and the pressure again.
Other drivers may rush around you, but that is fine. You are being responsible and careful. A calm drive keeps you and your vehicle safe until you get a full replacement tire.
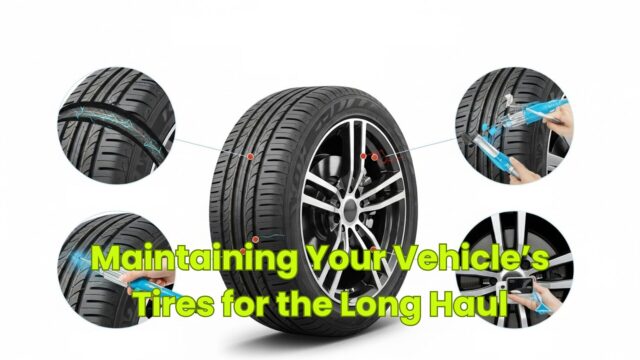
Maintaining Your Vehicle’s Tires for the Long Haul
If you want to avoid the drama of a flat tire on the side of the road, a little tire maintenance goes a long way. Start by checking the air pressure in all your tires—including your spare tire—at least once a month. Low pressure is a sneaky culprit behind many flats, and it’s so easy to fix. Just grab a pressure gauge and make sure each tire is at the recommended level (you’ll find this info in your vehicle owner’s manual).
Don’t stop at pressure checks. Give your tires a quick visual inspection every now and then. Look for uneven tread wear, cracks, or bulges—these are signs your tires might be ready for retirement. And don’t forget about your spare tire! It deserves the same attention as the ones on your wheels, because a flat spare is no help in an emergency.
Rotating your tires every 5,000 to 8,000 miles is another simple step that keeps them wearing evenly and lasting longer. Your owner’s manual will have the best advice for your specific vehicle. By following these easy habits, you’ll boost your safety, save money, and keep your tires (and spare) ready for whatever the road throws at you. Learn more about seasonal tire maintenance and care tips.
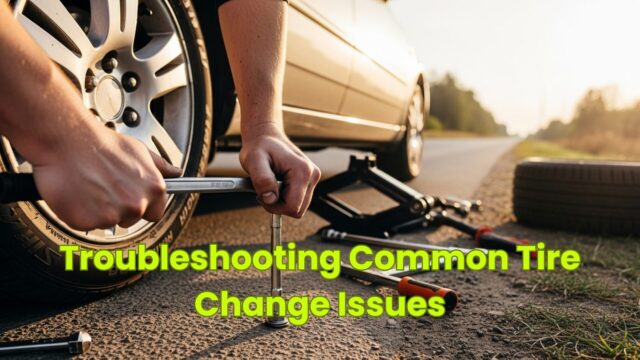
Troubleshooting Common Tire Change Issues
Let’s be real: sometimes changing a tire doesn’t go as smoothly as you’d like. Maybe those lug nuts just won’t budge, or you discover your spare tire is low on air. Don’t panic—these problems are common, and you’ve got options.
If you’re dealing with stubborn, loosened lug nuts that refuse to move, reach for a lug wrench with a longer handle or a breaker bar. The extra leverage can make all the difference. Always double-check that you’re turning the nuts the right way (lefty-loosey, righty-tighty!) and follow the steps in your owner’s manual.
If your spare tire’s pressure is low, use a portable air compressor or head to the nearest service station to inflate it to the proper level. Never install a spare that’s underinflated—it’s a safety risk and could leave you stranded again.
And remember, safety first: always change your tire in a safe location, away from traffic, with your hazard lights on to alert other drivers. If you’re stuck or something just isn’t working, don’t hesitate to call for roadside assistance. Sometimes the smartest move is letting the pros handle it, especially if you’re in a tricky spot. Check out when to call roadside assistance vs DIY repairs.
Overcoming Common Fears and Anxieties About Tire Changing
Let’s be honest—changing a tire for the first time can feel intimidating. But here’s the secret: with the right tools and a little practice, you’ll be changing a tire like a pro in no time. Start by getting comfortable with your lug wrench, jack, and spare tire. Lay them out, read your owner’s manual, and get familiar with each step.
If you’re nervous, practice changing a tire in a safe spot like your driveway or an empty parking lot. Take your time, follow the simple steps, and remember to always loosen the lug nuts before lifting the vehicle. When it’s time to tighten the lug nuts, use a star pattern to make sure the pressure is even and your wheel is secure.
Don’t rush yourself—confidence comes with experience. If you’re still feeling anxious, ask a friend or a mechanic to walk you through the process, or look for a tire-changing workshop in your area. And always prioritize safety: use your hazard lights, pick a safe location, and keep an eye on other drivers.
You’ve got this. Every time you practice, you’re building the skills and confidence to handle a flat tire safely and efficiently. And that’s something to be proud of. For more confidence-building tips, read our article on essential car skills every new driver should master.
Knowing How to Change a Tire Makes You More Confident
Learning how to change a tire is not just about the mechanics. It is about the confidence you build. You now understand how to loosen the lug nuts, lift the car, replace the wheel, and stay safe. These simple steps turn you into someone who handles problems instead of panicking. This knowledge applies to all vehicles, not just cars, making you prepared for a variety of situations.
You also understand why tools matter. You know how to use your wrench, your jack, your rod, and your emergency brake. These are not small wins. They are real-life skills.
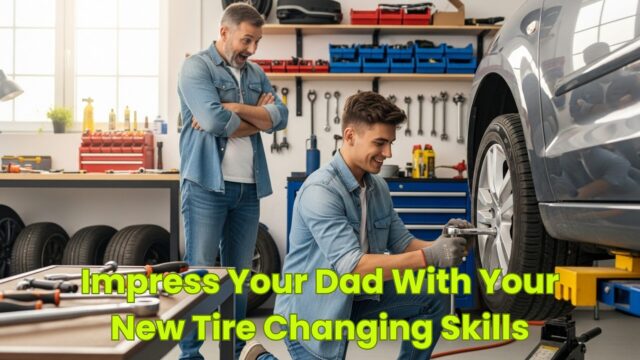
Impress Your Dad With Your New Tire Changing Skills
Let us be honest. Showing your dad that you can change a tire is iconic. He will look at you differently. It is like you unlocked a new level of adulthood. You no longer depend on roadside assistance for every small issue.
When he asks if you know how to change your tires, you can smile and say yes. You can explain how you loosen, position, crank, lift, pull, replace, and tighten. The star pattern or crisscross pattern should be discussed when tightening lug nuts. Additionally, mention checking the spare tire’s pressure and using the right tools.
UP NEXT: How to Do an Oil Change Without Calling Your Dad
Source link