How to Fill a Check Out If You’re Gen Z and Confused


If you are googling how to fill a check out, you are already ahead of many people. Checks still exist, even in a world of online banking and cash apps. Some landlords, schools, or old school relatives still want a personal check.
You might use one for monthly rent, a school fee, or some random government payment. Knowing basic check writing is still part of adulting, like understanding your bank account statement. So let us walk through this with a clear step by step guide that actually makes sense.
Here is the thing: checks are not going away anytime soon. Despite all the apps and digital wallets taking over, millions of checks still get written every year in the United States. Small businesses often prefer them because they avoid credit card processing fees. Government offices sometimes require them for official payments. Even some contractors and service providers stick with checks because they trust the paper trail more than a digital receipt.
The reality is that knowing how to write a check gives you flexibility in situations where other payment methods fail. Your payment app might be down, your card might get declined, or you might be dealing with someone who simply does not accept electronic payments. Having a checkbook in your back pocket means you are never stuck without a way to pay. Plus, understanding checks helps you grasp how banking works at a fundamental level, which makes you smarter about your money overall.
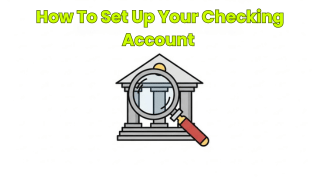
How To Set Up Your Checking Account (Without Losing Your Mind)
Opening a checking account might sound like something only your parents or that one super-organized friend knows how to do, but trust us—it’s way less scary than it seems. Think of it as unlocking the main tool you’ll use to move your money, pay bills, and keep your financial life on track. Here’s your step by step guide to getting started, minus the stress.
- Step 1: Pick Your Financial Institution. Start by choosing a bank or credit union that fits your vibe. Look for features like mobile banking, low fees, and a solid online reputation. Whether you go with a big name or a local spot, make sure they’re Member FDIC (that means your money is protected).
- Step 2: Gather Your Docs. You’ll need some basics: a government-issued ID (like your driver’s license or passport), your Social Security number, and proof of address. Some banks might ask for a student ID or a small opening deposit, so double check their requirements online before you go.
- Step 3: Open the Account. You can usually do this in person or online. Fill out the application, hand over your documents, and set up your login info for online banking. This is also when you’ll get your account number and routing number—keep these safe, since you’ll need them for direct deposit, writing checks, and more.
- Step 4: Set Up Security. Protect your new checking account from potential fraud by creating strong passwords, enabling two-factor authentication, and setting up account alerts. Most banks let you get notifications for every transaction, so you can spot anything weird right away.
- Step 5: Learn the Basics. Take a few minutes to explore your online banking dashboard. Check out how to view your bank account statement, transfer money, and reorder checks if you ever need them. Knowing your way around now will save you headaches later.
Setting up your checking account is the first step to adulting with confidence. With this step by step guide, you’ll be ready to manage your account, avoid potential fraud, and keep your money moving exactly where you want it.
Meet The Check: What Every Line Really Means
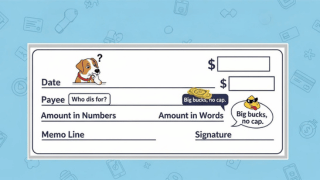
Before you write a check, you need to know what every line is trying to ask from you. A check is a simple contract between you, your bank, and the person you are paying. Each part helps the financial institution move your money correctly.
At the top right corner, you will see the date line. On the middle, there is the payee line and the amount box with a small box for numbers. The payee line is where you write the name of the person or business you are paying; this is where you enter the payee information. Under that, there is another line for the amount in words that includes cents. At the bottom, you will see the memo line, your signature line, and a bunch of numbers printed in funky ink.
Those numbers at the bottom right corner are important. One is the routing number, and one is your account number for your checking account. Together, they tell the bank exactly which account to use when the check gets cashed.
READ ALSO: How Gen Z Is Revolutionizing Our College Approach
Step One: Date The Check The Smart Way
Start with the date line at the top right corner of the check. In most cases, you use the current date so the payment can move normally. This tells the bank when you meant to fill out a check.
Sometimes, people use a future date. That is called post dating, and it can help when you expect direct deposit later. Just remember that some banks, like PNC Bank or others that are Member FDIC, may still process it earlier. So do not rely on a future date as a strong lock.
Whatever format you use, make sure the date is spelled correctly and clear. Use black ink and avoid messy scribbles. When you date the check clearly, you reduce confusion and potential fraud.
Step Two: Payee Line And Memo Magic
Now look at the center line that says pay to the order. This is the payee line, where you write the name of the person or business getting the payment. Write something like Jane Smith or the exact company name.
This matters more than you think. If the name of the person is wrong or not spelled correctly, the check amount might not go through. A vague word like “cash” can be risky if the check lands in wrong hands. You want the check correctly tied to one clear person or business.
Under that, you will usually see a smaller memo field or memo line. Use this to write “monthly rent,” “school fee,” or “tax season payment.” This helps you keep track of each payment amount later when you review your bank statement or online history.
Step Three: The Amount Box And The Dollar Words Line
Now we deal with the small box or amount box near the right hand corner. Here you write the numerical dollar amount using a dollar sign. For example, you might write “$750.25” as your intended amount.
Be sure the numerical dollar figures are tight to the left side of the box. This makes it harder for fraudulent activity to change your check amount. A clean cents amount like “.25” or “.07” also helps the financial institution read it clearly.
On the next line, you must write the payment amount in words. This line is also known as the legal line. This payment amount in words must match the number in the box and includes cents. For example, “Seven hundred fifty dollars and 25 cents”. If the dollar amount and the amount in words do not match, the bank uses the words as the official intended amount.
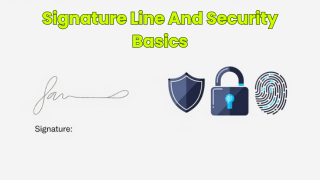
Step Four: Signature Line And Security Basics
At the bottom right, you will see the signature line. This is where you sign the check in the same style as your official signature on file. Use black ink and do not leave this part blank.
If you forget to sign, the personal check will not be cashed. Worse, if someone fakes your signature, that could be potential fraud or full fraudulent activity. Always double check that you fill every important part before your check falls into other hands.
Protecting Your Check Information
Remember, the numbers at the bottom right corner include your account number and routing number. Guard your checks like you guard your phone. When you are writing checks, treat each one like a small contract that moves real dollars from your bank account.
Never leave blank checks sitting around where roommates, guests, or strangers can access them. Store your checkbook in a secure drawer or locked bag, and never write checks in public spaces where someone could watch over your shoulder. If a check goes missing, contact your bank immediately to put a stop payment on it before someone tries to cash it fraudulently.
READ ALSO: How to Do an Oil Change Without Calling Your Dad
Step Five: Record It So Your Money Story Makes Sense
After you fill out a check, do not just toss the checkbook back in your bag. Use the checkbook register to keep track of every payment amount. This is where you write the date, check amount, payee, and any quick notes.
Later, when your bank account statement or bank statement arrives, you can compare it. Look for outstanding checks, unlisted deposits, and anything strange in your online history. This habit helps you catch mistakes and spot potential fraud early.
Tracking Checks Digitally
You can also use online banking or mobile banking to match each payment. Some people skip paper checks and use direct deposit for income instead. But when you do use checks, this simple tracking step keeps your money story clean and less stressful.
Many banking apps now let you take photos of checks to deposit them remotely, and they also show pending checks that have not cleared yet. Set up alerts so you get a notification when each check processes. This way you know exactly when the money leaves your account and can catch any delays or issues before they snowball into overdraft fees or bounced payments.
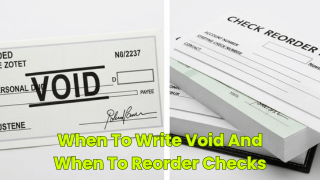
When To Write Void And When To Reorder Checks
Sometimes you mess up and the check correctly is not possible anymore. Maybe the payment amount is wrong or the name of the person changed. In that case, do not panic. Just write void in big letters across the front.
This turns it into a voided check that no bank should process. You can still keep it in your checkbook register with a note, so you keep track of why that number disappears. Never toss a half written check where wrong hands can find it.
If your supply gets low, it is time to reorder checks from your financial institution. Make sure your account number, address, and checking account details are correct. Treat this like updating your digital info before a big tax season review.
How Checks Fit With Online Banking And Mobile Life
Checks live in the same world as online banking, cards, and payment apps. You might get paid by direct deposit, then use a check for a rare payment. Or you use a check to prove your account with a voided check during setup of an automatic bill.
Your online history and mobile banking app will show when a check gets cashed. That is your signal that the check amount left your bank account. Compare it with your checkbook register and your bank account statement.
Most major banks, from local credit unions to brands like PNC Bank, are Member FDIC. That gives you protection for your balances. Still, you are the first guard against fraudulent activity, so keep an eye on every payment.
READ ALSO: How to Change Your Tires and Impress Your Dad
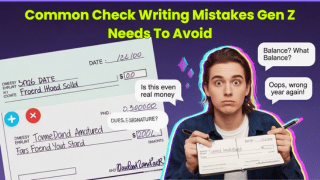
Common Check Writing Mistakes Gen Z Needs To Avoid
The biggest mistake is rushing and not matching the numerical dollar amount with the payment amount in words. Always double check that the dollar amount in the amount box matches what you wrote on the line. Make sure both includes cents if needed.
Another classic issue is using messy handwriting or skipping black ink. If the words are unclear or not spelled correctly, the bank may delay the payment. Sloppy checks are easier for potential fraud and edits.
Finally, never leave the signature line or memo field blank if you can help it. And do not forget to sign the check before handing it over. A missing signature can stop the personal check from being processed.
Why Learning To Fill Out A Check Still Matters
Yes, you live in a world of instant transfers and fast mobile banking. But knowing how to fill a check out is like knowing how to read an old map. It teaches you how money moves inside a financial institution.
Understanding your checking account connections means learning how your routing number and account number work together. The process of writing checks helps you see how transactions affect your bank statement and budget. Plus, you’ll recognize how potential fraud or fraudulent activity can start with one careless moment.
So the next time someone asks you to fill out a check, you will not panic. You will date the check, write the check amount, fill each line, and sign with confidence. That is real world money skill, and it looks good on you.
Your Gen Z Friendly Check Writing Checklist
Here is your fast mental list whenever you write a check. First, date the check on the date line at the top right corner. Decide if you use the current date or a careful future date.
Second, fill the payee line with the exact name of the person or business. Third, add the numerical dollar amount with a clear dollar sign in the amount box. Fourth, write the payment amount in words on the long line so it includes cents.
Fifth, write something useful on the memo line or memo field, then sign the check on the signature line. Finally, record everything in your checkbook register or online banking notes. That is how you check correctly, protect your bank account, and keep your money story clear.
UP NEXT: Best Tips For Young Entrepreneurs
Source link