Lecture 4: Supply & Demand Zones In SMC — How To Identify, Why They Matter, Strong Vs Weak Zones | Trading Strategy Guides
Introduction
In Smart Money Concepts (SMC), Supply and Demand Zones are essential tools traders use to understand how the market truly moves. These zones represent areas where institutional traders — also known as “Smart Money” — placed large buy or sell orders. Understanding these zones helps beginner traders anticipate where price might reverse or continue, giving them a clear map of where Smart Money is likely to act again.
This lecture will cover not only what Supply and Demand Zones are but also how to identify them correctly, why they matter so much, and how to tell a strong zone from a weak one. For beginners, this skill is foundational to mastering the SMC approach.
What are Supply & Demand Zones?
In any financial market, prices rise when buying pressure is stronger than selling, and prices fall when selling pressure outweighs buying. Supply and Demand Zones are areas on the chart where this imbalance between buyers and sellers occurred with such intensity that the price left the zone very quickly.
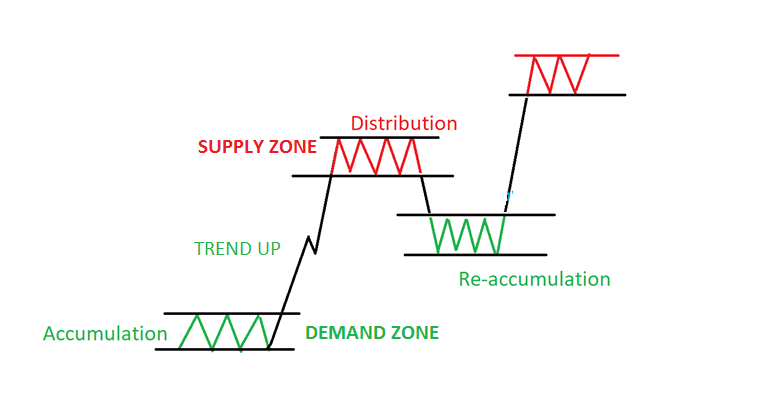
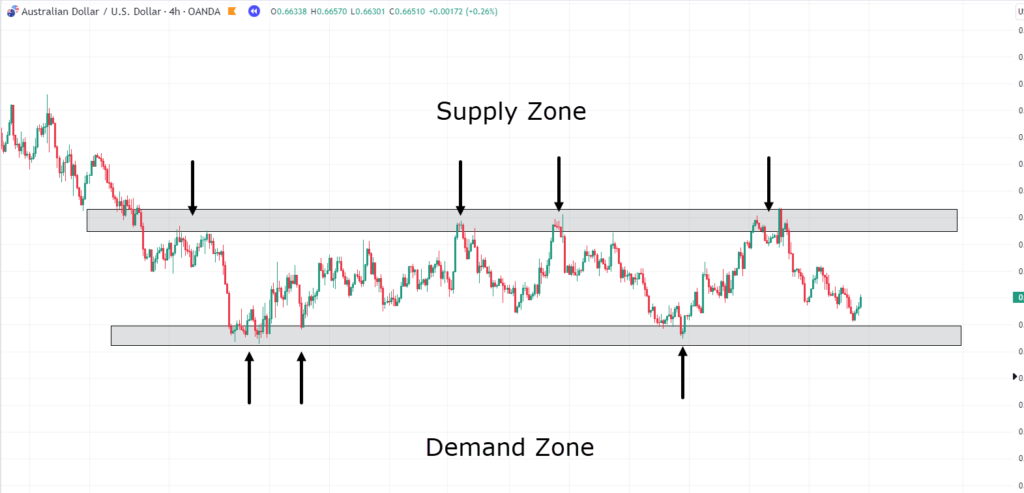
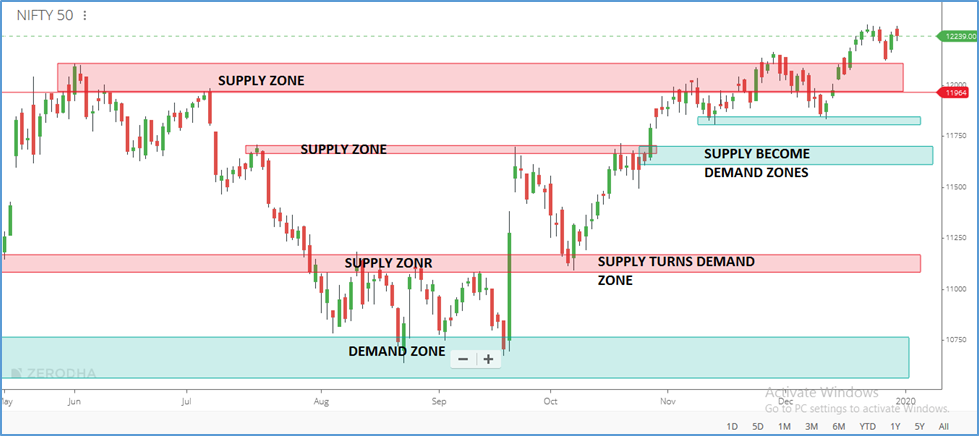
A Supply Zone is an area where heavy selling takes place, driving prices down sharply. When price returns to this zone in the future, there’s a high chance that sellers may step back in, causing price to drop again.
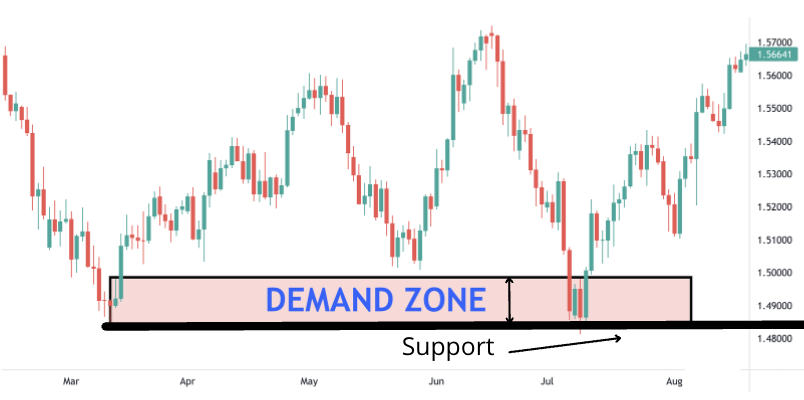
A Demand Zone, on the other hand, is an area where heavy buying takes place, pushing prices higher. When price revisits this zone, buyers might step back in, creating a bounce upward. These zones work like magnets, attracting price back to them before the market makes its next move.
How to Identify Supply & Demand Zones
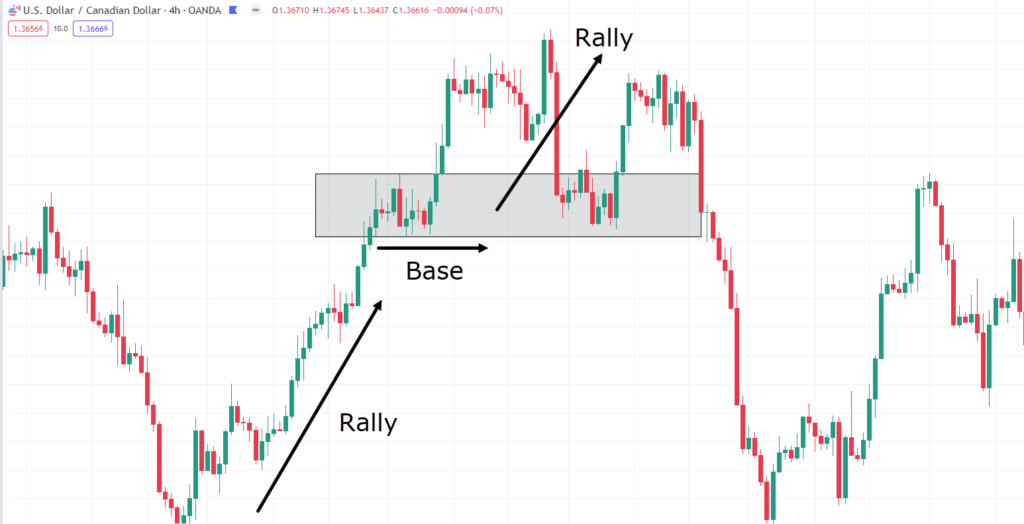
To identify a Demand Zone, you need to spot a strong bullish move — meaning price shoots up with large candles and very little pullback. Before that upward movement starts, there will usually be one or two bearish candles (red candles if you use default chart colors). These candles, sitting right before the explosive move, form your Demand Zone.
To identify a Supply Zone, look for a strong bearish move where the price drops sharply with large candles and minimal pullback. The candle (or small group of candles) that came right before this fall — usually a bullish candle — forms your Supply Zone.
In both cases, you want to draw a box that covers the body and wicks of the relevant candle(s). This box becomes your visual representation of the zone. Whenever price returns to this box in the future, you can expect Smart Money to react, either defending the zone or using it to trap retail traders.
Why Supply & Demand Zones Matter in SMC
In Smart Money Concepts, these zones are critical because they reveal the actual footprints of institutional players. When institutions place large orders, price moves rapidly away from the area because there are simply no more orders left to fill — this leaves behind an imbalance.
The importance of these zones is that Smart Money often returns to these same areas to fill more orders they couldn’t complete the first time. This is why price so often bounces or reverses at these levels. If you understand where these zones are, you have a massive advantage over traders who rely solely on indicators.
In practical terms, this means you can anticipate where the market is likely to reverse or pause instead of reacting after the fact.
Strong vs Weak Supply & Demand Zones
Not all Supply and Demand Zones are equally powerful. Beginners often make the mistake of marking every tiny move as a zone, but this reduces accuracy. To avoid this, you need to understand what makes a zone strong or weak.
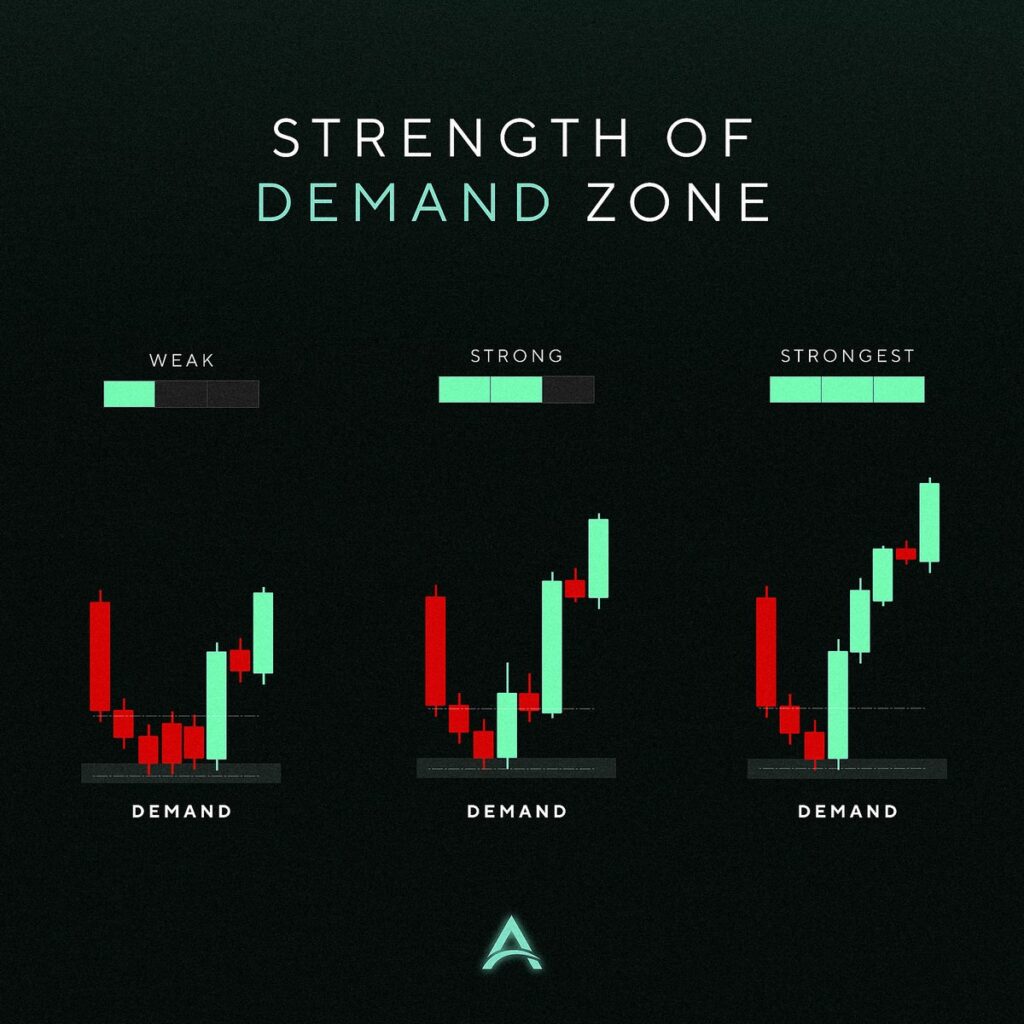
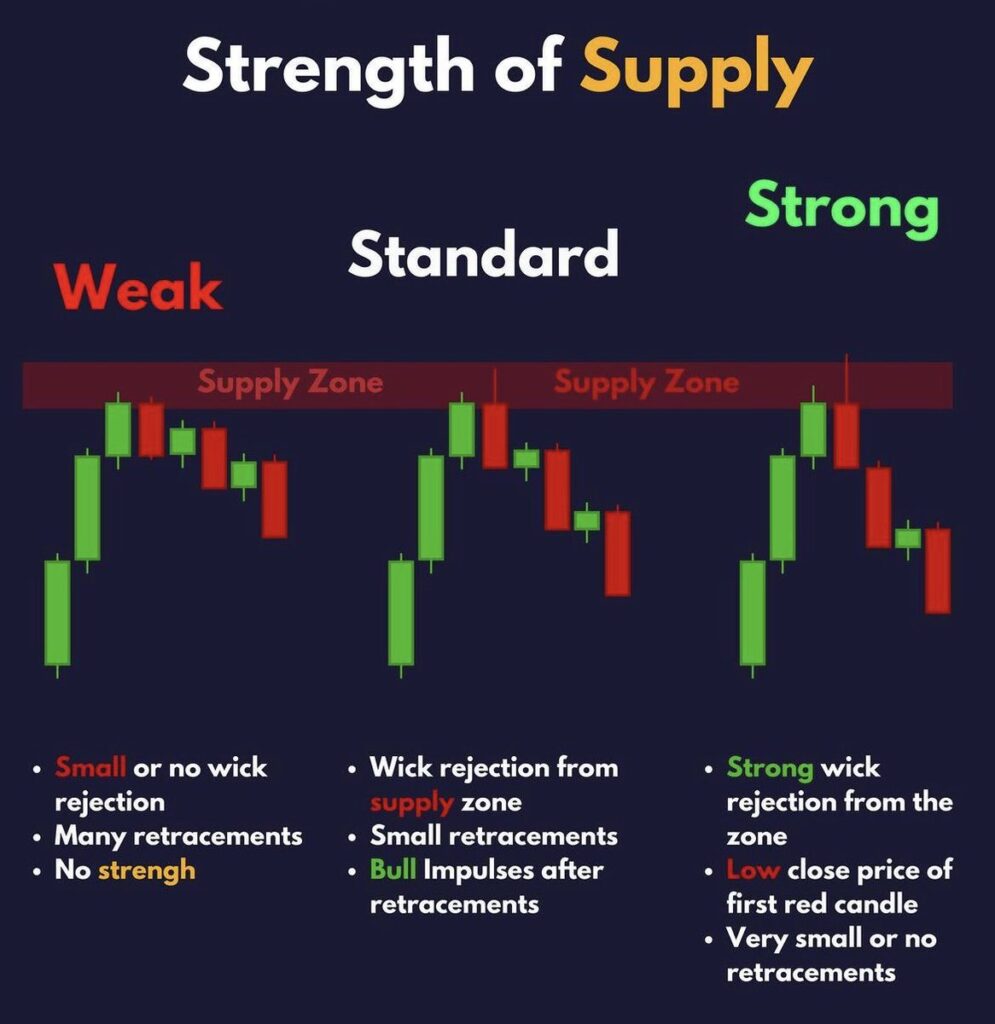
A strong zone is created when the price leaves it with extreme momentum — large candles with very little pullback. A strong zone will also cause a Break of Structure (BOS), meaning the price breaks a previous high (for demand) or low (for supply), proving that this zone caused a major shift in market direction.
A weak zone, in contrast, forms when price drifts away slowly, with small candles and lots of pullbacks. These zones are less reliable because they show that there wasn’t enough conviction from Smart Money. Weak zones are even more unreliable if the price has already tested them multiple times.
Practical Example – Strong vs Weak Zones
Imagine the price is rising sharply after touching a Demand Zone. This Demand Zone caused a clear Break of Structure — price broke above a previous swing high. This is a strong zone. Now imagine a different situation where the price left a zone slowly with lots of back-and-forth candles, and the zone was tested 3 times already. This is a weak zone because the orders there are likely already used up, and the zone didn’t cause any significant market shift.
The Process – Using Supply & Demand Zones in Your Trading
To use these zones correctly, you should first focus on higher timeframes like the 1-hour or 4-hour chart if you trade intraday. The higher timeframe gives more reliable zones because they reflect institutional orders more accurately.
Once you mark your zones, wait patiently for the price to return to them. Don’t assume price will react every time — you need to combine the zone with confirmation signals, such as a Break of Structure (BOS) or a Change of Character (CHoCH) in lower timeframes. This tells you that Smart Money has truly defended the zone.
When price touches a Demand Zone and immediately forms a bullish engulfing candle or breaks a lower timeframe structure upwards, that’s confirmation that buyers are stepping in. If this happens at a Supply Zone but with bearish confirmation, it signals that sellers are in control.
Beginner Tip – Don’t Overmark
One of the biggest beginner mistakes is marking every little move as a Supply or Demand Zone. This clutters your chart and confuses your analysis. Instead, focus only on the clearest, strongest zones that caused obvious sharp moves and structural breaks.
Quick Visual Summary
Here’s a simplified way to think about zones:
Strong Demand Zone: Price shot up fast, broke a previous high, and left a clear imbalance (gap).
Weak Demand Zone: Price drifted up slowly, didn’t break any high, already tested twice.
Strong Supply Zone: Price dropped fast, broke a previous low, and left a clear imbalance.
Weak Supply Zone: Price drifted down slowly, didn’t break any lows, already tested twice.
Final Words for Beginners
Mastering Supply and Demand Zones is not about memorizing rules but understanding how Smart Money trades. Smart Money needs to buy low and sell high, and they do this by building positions in these zones. Your job as a beginner is to see the footprints they leave and trade alongside them, not against them.
Source link